
Before I begin this tutorial I want to take a moment and discuss gems on the playa. It is very easy for these shiny little bits to fall into the dust and become Moop. Which for you first timers might seem like no biggy since they are small right? Wrong. Every year I have raked the playa and pulled up pieces of glitter out of the dust because we mean it when we say "Leave No Trace". So where does that leave gems? In a grey area because much like feathers they are allowed IF, and only if they are secured in a manner where they won't end up on the ground. That means I DO NOT put them on my face, but I will add them to my outfits when I am confident no one will be pulling my gems out of the dust with tweezers.
For this project I did a bunch of research and consulted several pros who do this kind of work for a living to discover the proper glue that will keep these gems on, no matter the conditions. I ended up using GSHypo XTL-1001 Cement glue, and the other glue I can recommend is the E6000 glue.
Ok, I am off my soapbox, onto the crafting!
I can appreciate the crafting that goes into some of the goggles that I see on etsy. But I have to be honest, I don't have $100+ to spend on a pair of goggles that I use once a year. Tragically I lost my goggles last year, and so this year I decided to take the leap and decorate my own pair.
I saved some on the initial cost by purchasing a used pair of goggles on Poshmark, which is an ah-mazing app and website that sells tons of used clothing and accessories. I scored my new pair for $8 + plus shipping. If you haven't used Poshmark, download the app, and use code UBOSU to save $5.
Supply List:
Step 1: Very carefully sand the portion of your goggles that intend to glue to. Don't skip this step as you will need those gems to stay in place. Just be VERY careful not to scratch your lenses, which I managed to do ever so slightly.

Step 2: Wipe down the portions of your goggles that will be glued to with rubbing alcohol and clean the surface to be clear any oils or dust. Use a fine point glue pen, they are easier to use and unlike other glues, the fine point is less likely to get clogged.

Step 3: Place your first gem by picking it up gently with the tip of your wax pen, coat the back of the gem with some glue and place it in the desired location. I started at the nose, directly in the middle and created the pattern outward from there.
The gems can be moved a bit after they are put down, but get more difficult to move with in a few minutes, and will be completely set in 24 hours. Continue this process until you've covered a small portion of your goggles.

Step 4: If you want your goggles to be symmetrical I recommend doing small portions of gems on one side and then the other. Nothing will be totally perfect, but doing this will help you remember your pattern. Or just embrace chaos theory and bedazzle at will.
Step 5: Allow gems to dry for 24 hours before putting them away.
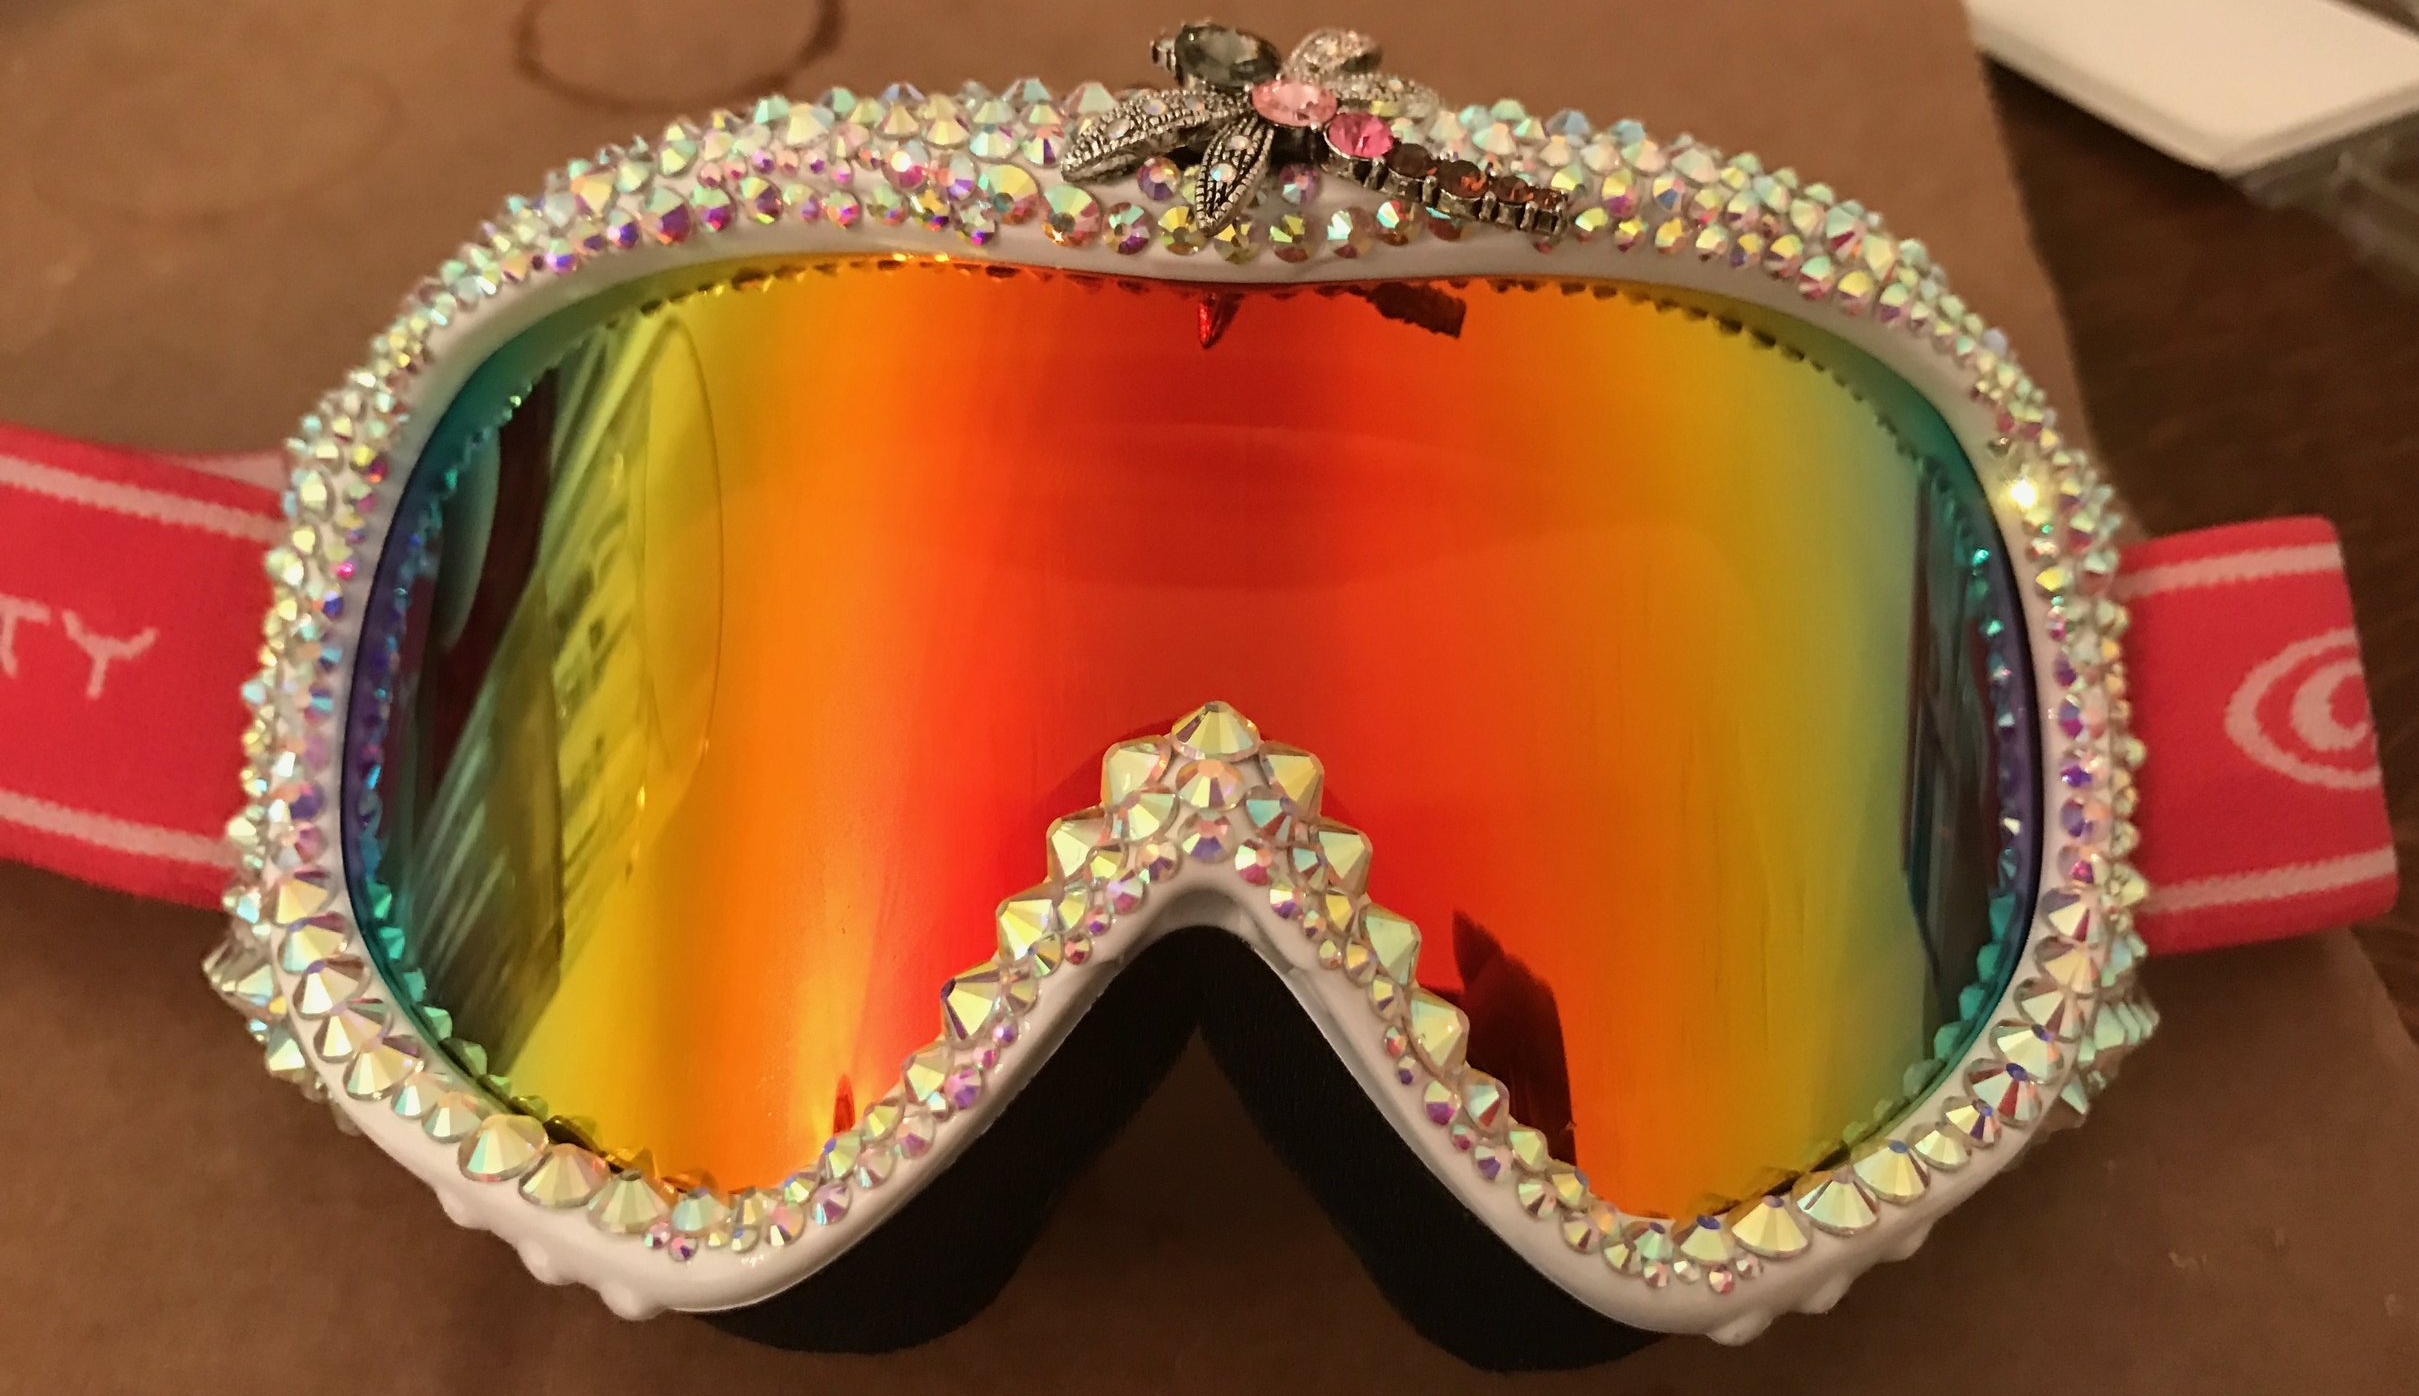
And here are the final results:
A few more tips: If you have something to cover the lenses with while you glue, I recommend doing it. Occasionally I had a gem drop glue side down on the lens, and it was not fun to clean. Tackle this project in small chunks of time. My goggles took about four hours over three days, which allowed me to relax about the layout of the gems. Finally, be sure to leave some space on the goggles where you can grab them to put them on and remove them from your face.